Showing posts with label pies. Show all posts

Monday, April 4, 2016

Blueberry Mango Pie

My new favorite, especially for spring.  


For an 8 or 9 inch pie
For a 9 inch pie I have to adjust the recipe so that I still have a full pie.  Also, for a lattice crust, or if you want extra dough for braiding or any add ons, you will need more dough.

Pie Crust Recipe:
2 c. flour
½ t. salt
¼ c. sugar
2/3 c. shortening
8-9 T. cold water

For detailed directions of my 
pie crust.

Fruit Filling:
5 c. berries/mangos (1-2 cups mango, 3-4 cups blueberries)
1 c. sugar
2 T. flour
3 T. cornstarch
1/4 t. salt


For the fruit, I use frozen, but let it sit out for a little while (maybe 30-45 minutes) before using it.   In a separate mixing bowl, mix the sugar, flour, cornstarch, and salt. Mix in the fruit.  I like to mash some of the berries (maybe ½ c.) to help absorb and mix the sugar mixture.  If you were using blackberries, which is what I originally used this recipe for, the berries break while you mix it and you don’t have to worry about it, but you want it to incorporate.   Add the berry mixture to the empty pie crust, and spread evenly to the edges.
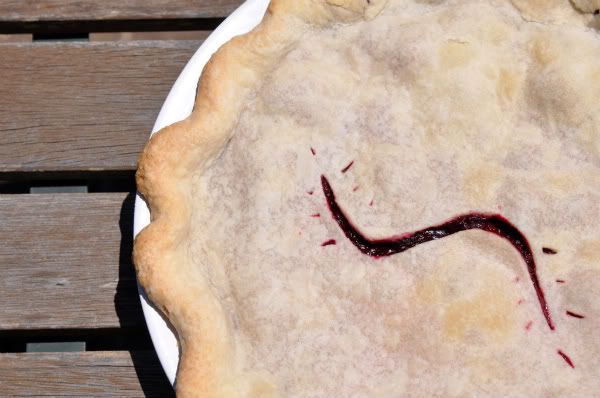
Cover pie with top rolled out crust. Roll the edges in to seal in the berries and design the edges however you prefer. The top should have some kind of an opening to allow air to be released, use any design you prefer for that as well, with a knife, just deep enough to cut the crust.  You can use an egg wash over the crust if you would like and sprinkle it with sugar, or just leave it dry. 
Bake at 375 for about 50-60 minutes. The edges of pies have a tendency to burn, so you may need to use a pie crust saver, or just foil will work fine. You can cover almost the entire top and edges with foil, just as long as you cut a hole in the center, to allow air to flow. The pie is almost done once the filling begins to bubble through the cut made in the crust (let bake for 5-10 minutes after you notice a bubbling edge).


Pin It!

Saturday, April 2, 2016

Lemon Meringue Pie

I need to give my mother credit for a majority of this recipe, as well as the pie crust. I'm not sure where she originally got it from, but she's been using it for years and I owe my love of pie making to her :)


Lemon curd:
1 1/2 c. sugar
4 T. cornstarch
3 T. flour
dash of salt
1 1/2 c. hot water

3 egg yolks
2 T. butter
1 t. lemon zest
1/3 c. lemon juice

Meringue:
5 egg whites
1/4 t. cream of tartar
6 T. sugar
1 t. vanilla

Photobucket>

From my pie crust recipe (only use half because this is for one lemon meringue pie) cook the crust on 425 for 10-15 minutes, until edges are slightly golden. Before cooking you will need to fork the bottom of the crust a few times, and also either fill with pie beans or use a few pieces of foil to use as a form for the pie. The crust will collapse if there is nothing keeping it up around the edges.

For the Lemon Curd: In a saucepan, mix sugar, cornstarch, flour, and salt; gradually add hot water, stirring constantly, over high heat. Cook until mixture comes to a boil. Reduce heat; cook and stir 2 minutes longer. Remove from heat. Slightly beat egg yolks and stir a small amount of hot mixture into them. Add spoonful at a time of the hot mixture to the egg yolks, stirring the whole time. Now mix the egg yolk mixture into the hot mixture. Bring to a boil and cook for 2 more minutes, stirring constantly. Take off heat; add butter and lemon zest. Slowly add lemon juice, mixing well. Pour into cooked pastry shell.

For the Meringue: In a mixer, beat egg whites and cream of tartar until soft peaks from, about 5 minutes. Add sugar and beat until stiff peaks form. Add vanilla and mix until completely combined, just a few more seconds. Spread meringue over filling. Use a spoon to seal the meringue to the edge of the crust and to create a wave over the top. You don't want to have a peaks to high, because they could possibly burn.

Bake at 350 for about 15 minutes, until the meringue is golden brown. Check about midway through and make sure the tops of the meringue peaks are not getting too brown, if so, take down the temperature of the oven to about 320.


Pin It!

Friday, September 10, 2010

i've been thinking about...

this.. or something like it. For the past while I've been trying to eat healthier, and I have been. I think I dropped a few lbs and I've been feeling better. BUT, I just have these cravings for sweets, and not just sweets, but like, buttery, gooey sweets, with a crust, the worst kind! Anyways. I saved this picture of a chocolate pecan (derby pie) pie, which I think I've made a similar one before, and this is kind of what I want right now. Doesn't it look delish :)
Well happy weekend everyone. We've got plans for yard work, a good bike ride, a big family birthday party, and hopefully some down time.
with love
kristin ann :)
p.s. the picture was found here and the recipe as well. i tend to go through blogs and save pictures of pretty things or things that I want to make, and I think that's why this yummy thing was saved in my pictures. it's a sweet little blog much like mine; recipes, fashion, photography, weddings, and on and on. she found my blog, and then I found hers. it's great how blogging works like that.

Pin It!

Wednesday, June 23, 2010

boysenberry pie

Photobucket


These wonderful berries are out of my family's garden, which I just love.

For an 8-9 inch pie

Pie Crust Recipe:
2 c. flour
½ t. salt
¼ c. sugar
2/3 c. shortening
8-9 T. cold water

For detailed directions of my pie crust.

Boysenberry Filling:
4 c. berries
1 c. sugar
2 T. flour
3 T. cornstarch
1/4 t. salt

If you don’t have to wash the berries, don’t; they tend to hold a lot of water in them, but if you must, dry them well. In a separate mixing bowl, mix the sugar, flour, cornstarch, and salt. Gently mix in the berries. Add the berry mixture to the empty pie crust, and spread evenly to the edges.
Cover pie with top rolled out crust. Roll the edges in to seal in the berries and design the edges however you prefer. The top should have some kind of an opening to allow air to be released, use any design you prefer for that as well, with a knife, just deep enough to cut the crust.
Bake at 375 for about 50 minutes. The edges of pies have a tendency to burn, so you may need to use a pie crust saver, or just foil will work fine. You can cover almost the entire top and edges with foil, just as long as you cut a hole in the center, to allow air to flow. The pie is done once the filling begins to bubble through the cut made in the crust.


Pin It!

Monday, May 24, 2010

Strawberry Pie

Photobucket


Crust:

1 c. flour
1/4 t. salt
1/8 c. sugar
1/3 c. shortening
5-6 T. cold water

Mix flour salt and sugar. Add shortening and with a fork mix in the shortening. With the fork you lift from bottom to top, you don't press down to break up the shortening. It will take a little bit of time, and the pieces of shortening should all be pea size or smaller.
Take a few fork fulls of dough crumbles and set aside. Add the water to the flour mixture. If you're adding sugar to the recipe, you may need the extra tablespoon of water. The dough should come together as a ball in your grip, add a few more drops of water if necessary.
On a floured surface roll out dough with a rolling pin. Just roll it out to the edge of your surface or about 1/4 inch thick. It doesn't matter the shape or look of the dough at this point. Sprinkle the dry dough mixture, that had been set aside, on the top of the dough, to the edges. Roll dough up, like a fruit roll up, and close off the edges so the crumbs don't fall out. Cut into fourths, stack on top of each other, and smash down, so you have one large mass of dough.
Again on a floured surface roll out dough. This time you're going to eventually need a close to perfect circle, so when rolling out, try to keep your shape. After you've rolled dough out an few inches wider than pie pan. Place pan in the middle of dough and cut a circle out, use the extra pieces of dough to fill in places that didn't quite keep shape. Using rolling pin, roll dough over and then onto the top of the pie pan. Lift dough into pan, making sure that it's up against the walls and edges. Using your fingers roll the edges of the crust down and in so that it sits just along the edge of the pan. Once you've circled the whole crust, go back around, using your thumb and index finger to shape the crust. You can make the wave as tight or loose, as big or small as you would like.
For more detailed pictures go here.
Your crust is done!
Poke a few holes in the crust with a fork and bake for 10-12 minutes at 400 degrees. You should fill your crust with pie weights or an alternative (I use foil, by molding it to the inside of the crust), this is to keep the walls of the crust from caving in.

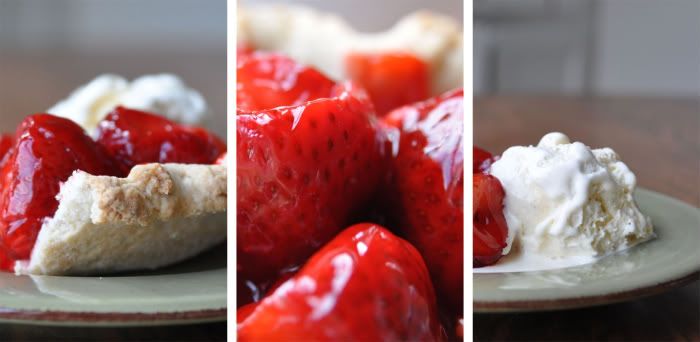
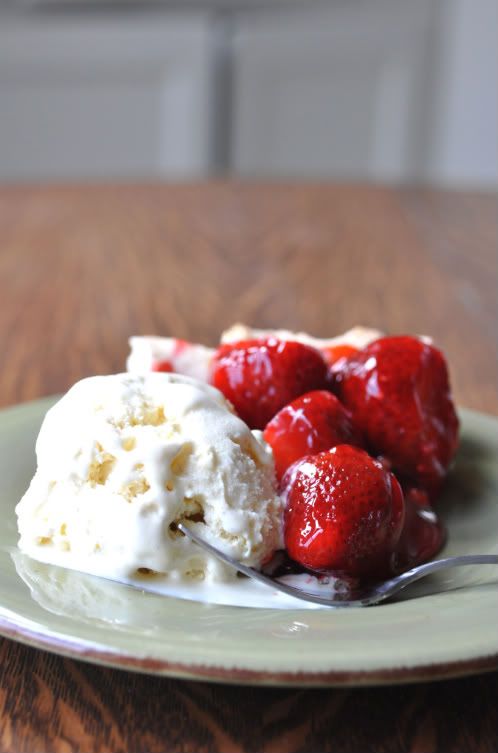
2 containers of large strawberries (4-6 cups)
1 container of strawberry glaze
vanilla ice cream or whip cream

Cut the tops off the berries and mix with the glaze, fill the crust and keep refrigerated until served.


Photobucket


Pin It!

Monday, February 22, 2010

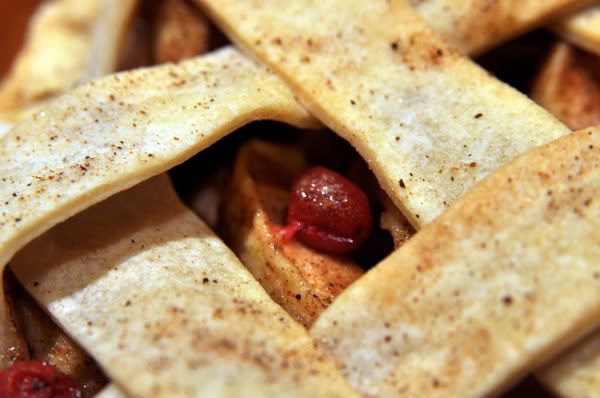
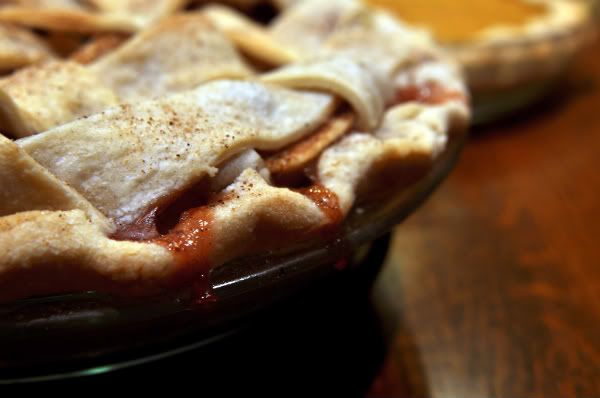
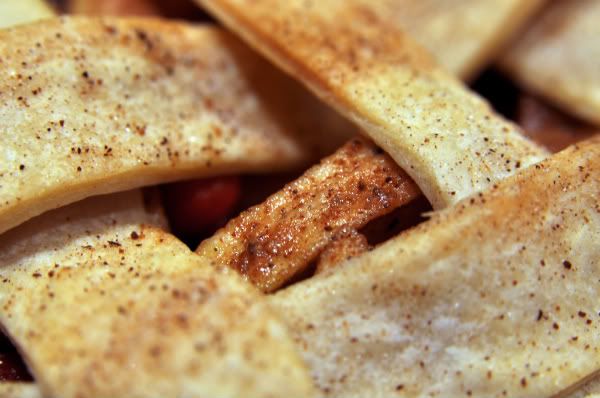
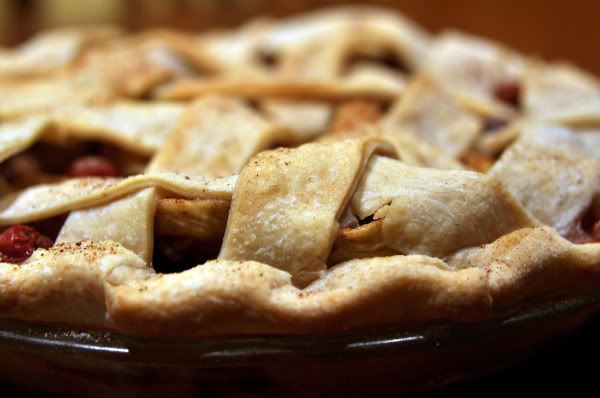
pretty cran-apple pie

Sorry for the no recipe posts lately. With all the wedding amazingness I've been a little busy!!! I made this gem around christmas time I think. I was a hit. Even if you don't like cranberries, just try it, you'll love it.


Photobucket


Pie Crust

2 c. flour
1/2 t. salt
1/4 c. sugar
2/3 c. shortening
8-9 T. cold water

Mix flour salt and sugar. Add shortening and with a fork mix in the shortening. With the fork you lift from bottom to top, you don't press down to break up the shortening. It will take a little bit of time, and the pieces of shortening should all be pea size or smaller.
Take a few fork fulls of dough crumbles and set aside. Add the water to the flour mixture. If you're adding sugar to the recipe, you may need the extra tablespoon of water. The dough should come together as a ball in your grip, add a few more drops of water if necessary.
On a floured surface roll out dough with a rolling pin. Just roll it out to the edge of your surface or about 1/4 inch thick. It doesn't matter the shape or look of the dough at this point. Sprinkle the dry dough mixture, that had been set aside, on the top of the dough, to the edges. Roll dough up, like a fruit roll up, and close off the edges so the crumbs don't fall out. Cut into fourths, stack on top of each other, and smash down, so you have one large mass of dough. Cut in half and set one half aside.
Again on a floured surface roll out dough. This time you're going to eventually need a close to perfect circle, so when rolling out, try to keep your shape. After you've rolled dough out an few inches wider than pie pan. Place pan in the middle of dough and cut a circle out, use the extra pieces of dough to fill in places that didn't quite keep shape. Using rolling pin, roll dough over and then onto the top of the pie pan. Lift dough into pan, making sure that it's up against the walls and edges. Using your fingers roll the edges of the crust down and in so that it sits just along the edge of the pan. Once you've circled the whole crust, go back around, using your thumb and index finger to shape the crust. You can make the wave as tight or loose, as big or small as you would like.
Your crust is done! Whether or not the crust is cooked now or after filled depends on the pie being made.

{for picture instructions}


Cran-Apple filling

3/4 cup sugar
1 teaspoon of cinnamon
2 T flour
1 t. nutmeg
dash of ground cloves
6-8 apples (peeled, cored, and cut in 6-8 slices)
1/2 c. cranberries whole (frozen or fresh)

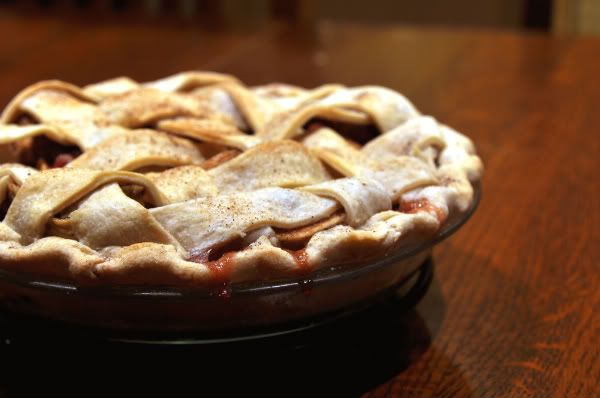
After you're finished with the apples (yes it takes forever sometimes, I know). Mix all the dry ingredients separately. Add about 3/4 of the mixture to the apples. With the bottom crust prepared in the pan, start to assemble the apples. It works best if you place the on the outer ring of the crust and work your way in. Sprinkle a few cranberries on each layer of apples until you've filled and exceeded the top of the crust. Dust the filling with the rest of the sugar/cinnamon mix. Assemble top as a basic pie, or a lattice top.

{for picture instructions for a lattice top}

Bake at 375 for about 50-60 minutes. You may need to use foil to cover the top and edges of your crust (they tend to burn before the filling is cooked through). The pie is done when the apples can be poked with a fork with ease (there shouldn't be much tension).


Photobucket

Photobucket

Photobucket

Photobucket


Pin It!

Tuesday, October 27, 2009

Mini Pumpkin Pie


Crust:
2 c. flour
1/2 t. salt
**1/4 c. sugar
2/3 c. shortening
8-9 T. cold water

For instructions and step by step pictures go here.

Normally this crust recipe is split in half for a top and bottom, you can still keep in half, just so it's easier to manage rolling out. The largest circle cookie cutter I have was stlightly too small for a cupcake, so I had to roll it out just a bit more. You can also make these in a tart size, therefore use a smaller circle cut out.
Bake just the crusts at 425 for about 6-8 minutes.


Filling:
15 oz. can of pumpkin (Libby’s)
2 eggs
½ t. salt
½ t. cinnamon
½ t. ground nutmeg
¼ t. ground cloves
¾ c. milk

Mix the pumpkin, eggs, salt, nutmeg, cinnamon, and cloves. Slowly add the milk.
Fill crusts with filling, and bake at 350 for 25-30 minutes (or until a toothpick comes out clean).


*Whipping cream


This idea is from Bakerella, an amazing blog that I know you'll love!!


Pin It!

Thursday, August 6, 2009

Cherry Pie

Cherry Pie


Crust:
2 c. flour
1/2 t. salt
**1/4 c. sugar
2/3 c. shortening
8-9 T. cold water

For directions and step by step photos of my pie crust.

Filling:
2 cans cherry pie filling

Once dough is made for the crust, split in half (top and bottom). Roll out the bottom crust and roll up and over the pie pan. Fill crust at an even level with pie filling, and set aside. Roll out the top crust the same size as the bottom crust, so about an inch wider than the pie pan. With a pizza cutter and a ruler, cut strips about an inch wide. Take four strips of crust, and align them evenly along the top of the pie crust, pressing the edge of the strip onto the edge of the bottom crust and fold back so that it does not touch the cherry filling. Alternating strips on the top and on the side you’re going to weave across the top, row by row. Once the top crust is laid out, trim the ends of the strips so they’re even with the bottom crust. Roll the crust up so that it lines the rim of the pie. Using your thumb and pointer finger shape the crust. Sprinkle the top crust with sugar. Bake at 350 for about 50 minutes. The cherries will start to bubble and the crust starts to darken. If the crust starts to darken too much, and the filling is not cooked yet, you can cover the crust rim with foil, or a tin pie crust saver. Pie should sit for a few hours before serving.


Pin It!

Wednesday, August 5, 2009

Key Lime Pie


Key lime Pie
Crust:
1 package graham crackers
1/3 c. sugar
5 T. butter


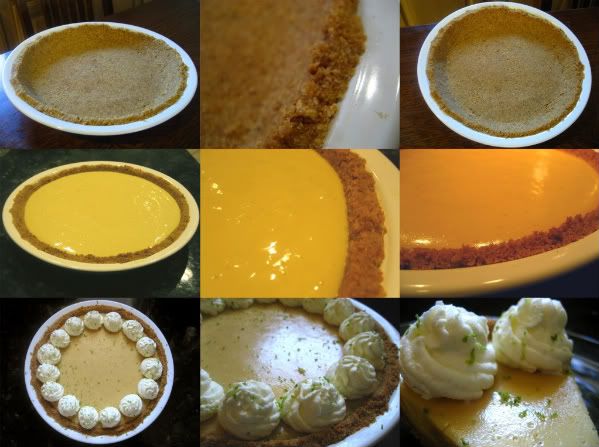
With a food processor, or if you put the crackers in a zip lock bag and use a rolling pin, get the graham crackers to a very fine consistency. Mix in sugar and melted butter until fully combined. Pour in 9 inch pie pan. Evenly distribute around edges and bottom, then press into pan. Bake at 350 for about 8 minutes, until edges start to darken.

Filling:
3 egg yolks
1 ½ t. lime zest
1 can sweetened condensed milk (14 ounces)
2/3 c. key lime juice

In a mixing bowl, whip egg yolks and zest for about 5 minutes. Add the sweetened condensed milk and mix for another 5 minutes, should thicken up slightly. Slowly add in the key lime juice. Pour batter into crust, bake at 350 for 10 minutes. Refrigerate for a few hours or overnight, garnish with whip cream and lime zest.

Photobucket


Pin It!

Wednesday, June 17, 2009

Boysenberry Pie


For an 8-9 inch pie

Pie Crust Recipe:
2 c. flour
½ t. salt
¼ c. sugar
2/3 c. shortening
8-9 T. cold water

For detailed directions of my pie crust.

Boysenberry Filling:
4 c. berries
1 c. sugar
2 T. flour
3 T. cornstarch
1/4 t. salt

If you don’t have to wash the berries, don’t; they tend to hold a lot of water in them, but if you must, dry them well. In a separate mixing bowl, mix the sugar, flour, cornstarch, and salt. Gently mix in the berries. Add the berry mixture to the empty pie crust, and spread evenly to the edges.
Cover pie with top rolled out crust. Roll the edges in to seal in the berries and design the edges however you prefer. The top should have some kind of an opening to allow air to be released, use any design you prefer for that as well, with a knife, just deep enough to cut the crust.
Bake at 375 for about 50 minutes. The edges of pies have a tendency to burn, so you may need to use a pie crust saver, or just foil will work fine. You can cover almost the entire top and edges with foil, just as long as you cut a hole in the center, to allow air to flow. The pie is done once the filling begins to bubble through the cut made in the crust.


Pin It!

Monday, April 13, 2009

Quiche

I love anything that has to do with breakfast foods, so of course I love quiche!!! You can make it just about any variety of vegetables and herbs, but this is my favorite concoction.


Pie crust recipe:
http://www.kristinannbeck.blogspot.com/2009/04/pie-crust.html

9 inch pie crust
2 c. shredded swiss cheese
1/2 lb. bacon cooked and crumbled
2 c. spinach chopped
3 tomatoes thinly sliced
1/2 c. basil chopped
1 1/2 c. cream
6 large eggs
salt and pepper


Divide the swiss cheese in the 3, everything else, split in half. You're going to layer the swiss cheese first, then spinach, tomatoes, salt and pepper tomatoes, basil, and bacon. Start with the swiss again, and push down layers into the crust. You don't want a lot of room between layers. Repeat all the layers, make sure to salt and pepper the next layer of tomatoes and end with swiss cheese on top. Flatten down into crust again.
Mix the cream and eggs in a bowl, add about 1/4 t. salt and however much pepper you would prefer. Slowly pour cream mixture over pie. It should not exceed the edges of the pie crust, so you may have more than needed. If you were to leave out the tomatoes in the recipe, which some prefer, you will be able to use all the cream/egg mixture.
Bake at 375 for 45 minutes to an hour. The pie should be golden brown on the top and look slightly inflated. The filling should also be stable. When it is not quite done, the filling will jiggle when moving the pie, it shouldn't do that. You can also pierce the top and look to see if the egg inside is cooked.

Pin It!

Pie Crust

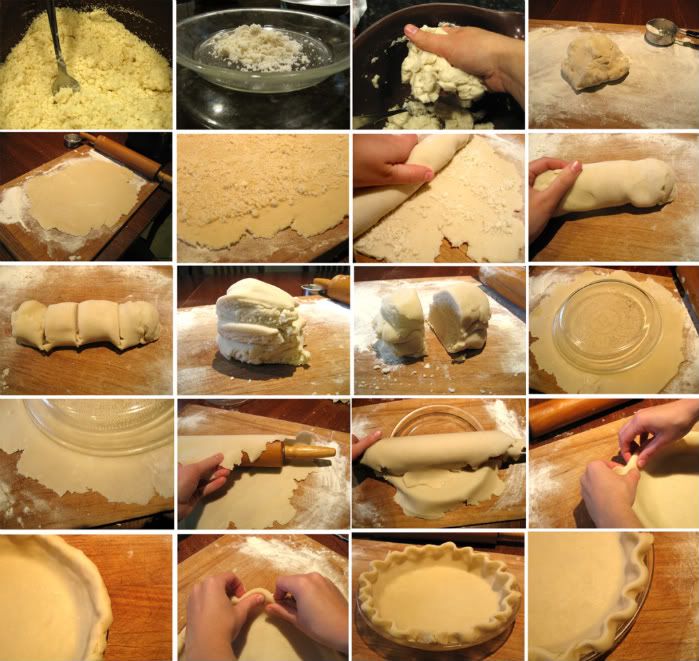
This is my basic pie crust recipe. It can be a difficult recipe to follow, which is why I added the step by step picture block. So if you decide to tackle baking pies, use the pictures as a reference. The basic recipe can be used for desserts or main dishes, such as quiche or chicken pot pie; but usually if I'm baking a dessert pie, I add the sugar, but it is optional.


Photobucket


This recipe is for a double crust pie (top and bottom, like an apple pie) or two single crusts (like pumpkin pie, or my quiche).

2 c. flour
1/2 t. salt
**1/4 c. sugar
2/3 c. shortening
8-9 T. cold water

Mix flour salt and sugar (only use sugar if you're baking a dessert pie!!). Add shortening and with a fork mix in the shortening. With the fork you lift from bottom to top, you don't press down to break up the shortening. It will take a little bit of time, and the pieces of shortening should all be pea size or smaller.
Take a few fork fulls of dough crumbles and set aside. Add the water to the flour mixture. If you're adding sugar to the recipe, you may need the extra tablespoon of water. The dough should come together as a ball in your grip, add a few more drops of water if necessary.
On a floured surface roll out dough with a rolling pin. Just roll it out to the edge of your surface or about 1/4 inch thick. It doesn't matter the shape or look of the dough at this point. Sprinkle the dry dough mixture, that had been set aside, on the top of the dough, to the edges. Roll dough up, like a fruit roll up, and close off the edges so the crumbs don't fall out. Cut into fourths, stack on top of each other, and smash down, so you have one large mass of dough. Cut in half and set one half aside.
Again on a floured surface roll out dough. This time you're going to eventually need a close to perfect circle, so when rolling out, try to keep your shape. After you've rolled dough out an few inches wider than pie pan. Place pan in the middle of dough and cut a circle out, use the extra pieces of dough to fill in places that didn't quite keep shape. Using rolling pin, roll dough over and then onto the top of the pie pan. Lift dough into pan, making sure that it's up against the walls and edges. Using your fingers roll the edges of the crust down and in so that it sits just along the edge of the pan. Once you've circled the whole crust, go back around, using your thumb and index finger to shape the crust. You can make the wave as tight or loose, as big or small as you would like.
Your crust is done! Whether or not the crust is cooked now or after filled depends on the pie being made.

Pin It!