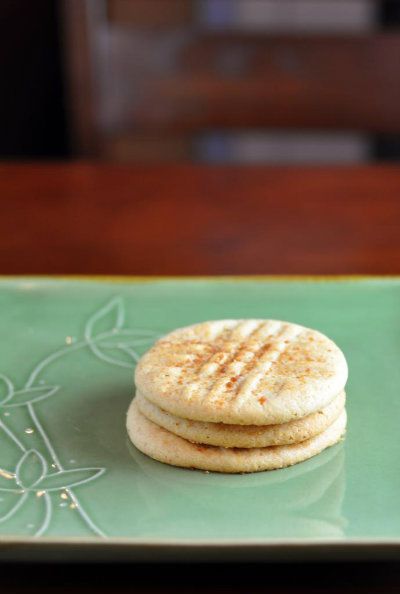
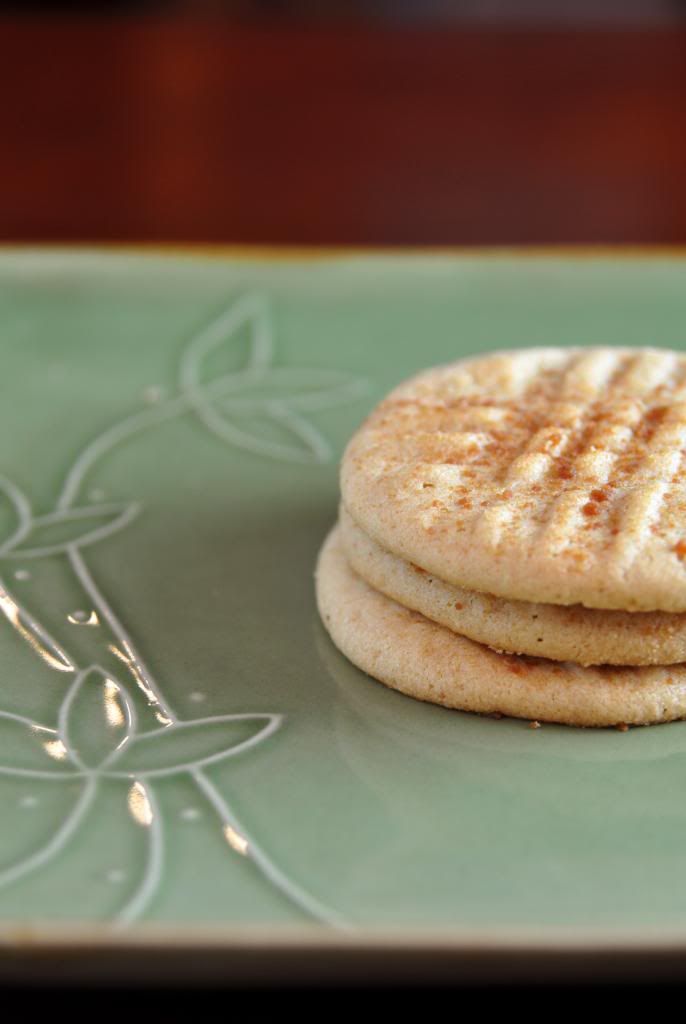
A while ago I posted this recipe for peanut butter cookies, it's my favorite, always turns out amazing. THIS recipe is just the gluten free and slightly less processed version. My goal is to make it completely unprocessed and more natural but I'm not completely there yet. Surprisingly I didn't have to change the amounts of any ingredients, just simple substitutions, which was amazing! I might actually keep this healthy baking up now :) So, all I did was sub Bob's Red Mill all purpose gluten free flour, for traditional all purpose flour, and organic coconut sugar for granulated sugar. It wasn't much of a change, but gluten free! My next step is substituting all the sugar, and switching out the butter for coconut oil.. next time!
Gluten Free Peanut Butter Cookies
1/2 c. butter
1/2 c. brown sugar
1/2 c. organic coconut sugar (or regular sugar)
1/2 c. all natural peanut butter
1 T. honey
1 egg
1 1/2 c. Bob's Red Mill all purpose gluten free flour
3/4 t. aluminum free baking soda
1/4 t. salt
Cream butter and sugars till light and fluffy. Add the peanut butter and honey, mix thoroughly.
Add egg , make sure to scrape bottom of bowl, and continue to mix.
Mix in flour, baking soda, and salt.
Use a cookie scoop or spoon, and then roll into 1 inch balls.
Use fork to make cross marks, dip fork in flour if it sticks to the dough.
Sprinkle the top with sugar (I used the coconut sugar).
Bake at 375 for 8-9 minutes.
Makes about 2 dozen.
I like my cookies soft and chewy, so I'm very careful about when I take them out of the oven. The cookies will puff up slightly and start to gain a little color around the edges before ready to be taken out.
*Important side note: the dough should not stick to your hands. You should be able to roll a ball without a mess, so if it's sticky, add a little more flour. Reason that the recipe doesn't always have the same moisture levels include, size difference in eggs, temperature of butter, brand of flour, brand of peanut butter.. tons of things! So just keep this in mind.
Friday, December 14, 2012
Saturday, December 8, 2012
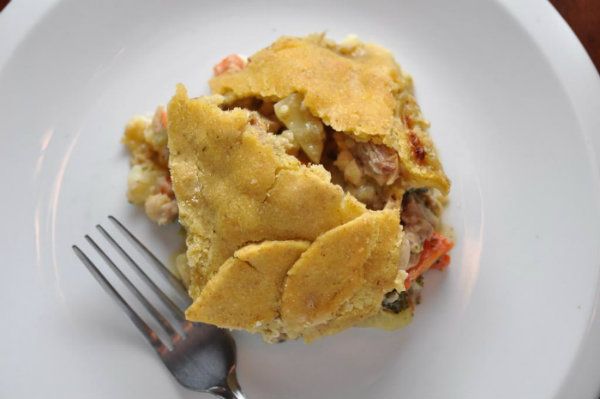
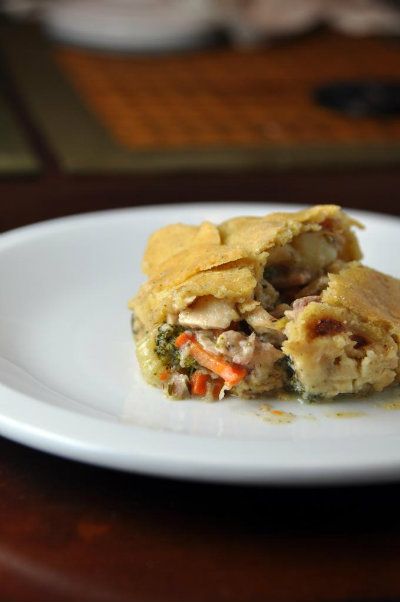
Chicken pot pie.. from leftovers! Oh and did I mention.. it's gluten free!
I love when we have leftovers and I can create a completely different meal with it! It's just the best thing ever. A few nights before this dinner I had baked a chicken, potatoes, broccoli and carrots, and we just had a whole bunch left. I did end up adding a few extra things, just because. Keep in mind this recipe is just estimated amounts of ingredients. The point, is that you can use whatever vegetable/meat leftovers you have! You might not be as excited as me, but this was a big deal for us at the murray house :)
Gluten Free Chicken Pot Pie
You can make the recipe with regular flour for the filling and crust, but because we have gluten issues at our house, we kick the gluten.
Filling:
2 cups chicken cooked and chopped
2 cups potatoes cooked and chopped (cubed)
2 cups broccoli steamed
1 medium white onion chopped
1 cup carrots chopped
1 cup celery chopped
oil or butter
In a large skillet I sauteed the onion, carrots, and celery with a little olive oil (if you don't already have cooked carrots). Added salt, pepper, and seasonings to taste (I like rosemary, sage, and thyme). Should take about 10-15 minutes to get everything soft and cooked through. I had a large bowl with the already cooked chicken and broccoli, and added the freshly cooked vegetables to the mix. You don't have to have any one of those ingredients. So if you have potatoes, peas, and carrots, already cooked, just use those, and you skip a step.
Gravy/sauce:
4 Tablespoons butter (or oil)
1/4 cup brown rice flour (or regular ap flour if you don't do gluten free)
2 1/2 cups milk ( you can use chicken broth, but not quite as much)
Salt and season to taste
In the same pan, melt 4 tablespoons of butter (or you can use oil), and with a wooden spoon mix in the flour. Over medium/low heat continue to stir this mixture in the pan, letting it sit occasionally. I just like to make sure that the flour cooks a little bit. Slowly add your milk to the pan while mixing. A whisk works best, but I use a wooden spoon so I don't scratch my pans. By slowly, I mean you only add a little bit, completely mix it in, and repeat. This sauce isn't always going to turn out exactly the same, because it depends on how long you cook it at every stage, and at what temperature, also the kind of milk/broth you use. So I never add all the liquid until I know what consistency I have and what I want. I like my sauce a little thicker, so that the slice of pot pie holds better, while others don't mind the soupy consistency. You can now salt and pepper to taste. Then add to the bowl of your pot pie filling! Mix lightly so that everything doesn't just mash up.
Crust:
1 1/2 cups gluten free flour (you can use ap flour)
1/2 teaspoon salt
1/2 cup coconut oil (you can use shortening)
about 6 Tablespoons of water
extra flour for rolling out
In a large bowl mix the flour and salt. Add the coconut oil and with a fork, mix away! This step takes a while, you can use a food processor or a hand pastry mixer to speed this up. You want all clumps of flour/oil to be smaller than a pea. Add the water slowly. You may need more, you want the mix to completely hold together, enough to roll out, but not too wet that it sticks to your hands or cutting board.
Roll out dough just larger than your 9x13 pan. After I rolled it out I place the pan on top, and cut out the shape of the crust so that it can lay just on top of the filling (but inside the sides of the pan). Add the filling to a butter/oiled 9x13 pan. Using your rolling pin, roll up your crust and unroll over the filling. Don't worry too much about how perfectly it fits as long as it doesn't lay over the sides of the pan. Make some kind of an air vent for the crust, by using a sharp knife. I usually just do a line maybe 5 inches long down the center.
Bake at 375 for 40-50 minutes. You want all the edges to bubble, and then you know it's heated through. Let sit for at least 15 minutes before you serve.
*I had extra dough, so I cut out a few leaves and placed them on top of the crust, which is why you see so many layers and what not. You could probably half this recipe to make it in an actual pie pan or a smaller corning ware type dish. I actually made the 9x13 and a medium corning ware size dish because I had quite a bit of filling, and I just made more sauce/gravy for the extra dish.

Labels:
dinner,
gluten free,
recipes
Friday, October 5, 2012
The new us..
So around here we've been working pretty hard on creating a healthier lifestyle for the whole family (Martin, Jen, Etta, and myself of course); most of this includes how and what we eat. Martin and I decided a long time ago we were going to try our best to have our children eat healthy and naturally, even if that meant we ourselves had to change quite a bit, and we needed to change quite a bit. This year Martin cut out soda, candy, and icecream, and I have somewhat kept up with him. But in order to really make sure I'm doing the best I can I took it a step further and decided to cut out all artificial colors and flavors, at least to the best of my ability. I've always felt that anything artificial should not be put into our bodies, but it really is just so hard to avoid! In our house it hasn't been a problem at all, because we do most of our own cooking and from scratch, but ANY where else, it's an issue. I know that if I go to a baby shower, or a dinner invite, or birthday party that a majority of the food will be something that I would prefer to not eat, as well as Etta, and that doesn't bother me. What's really hard is when people make you feel that you're making a bad decision by eating healthier, how does this make sense!? I've always known and realized that sometimes others don't support good decisions, perhaps because it makes them feel bad for their decisions and lifestyle, but regardless, we're doing this! The last few weeks I have felt so much better (less headaches and body aches, less abdominal cramping, more energy) and I think that with keeping the artificial out of my diet, it makes the decision of what to eat or not to eat so easy. I see desserts and candy and I can just easily say no.
Well with all this being said, my recipes that I post are going to unfortunately reflect this. I have a lot of growth to do, in terms of recipe knowledge and what not. Trying to create delicious and fun recipes but that keep out the artificial, the gluten, the sugar, a lot of the dairy, and even less meat as well, is going to be tough, but so far, we're figuring this out.

Tuesday, July 3, 2012
4th of July Treats :)
So, I didn't have time to make a new dessert, but made this last year, and it's one of my favs!! Pretty sure I'll be making these tonight.
More pretty pictures and the recipe are over here! Hope you have a very happy 4th of July, enjoy the good food and fireworks!
with love,
Kristin Ann :)
More pretty pictures and the recipe are over here! Hope you have a very happy 4th of July, enjoy the good food and fireworks!
with love,
Kristin Ann :)

Thursday, June 7, 2012
dinner!
Chicken Lettuce wraps!
Made these the other night, and they were a hit! Love em!
Recipe over here but really you can make them any way you want! I made a side of brown rice, because it's delicious and much healthier than white rice, and put it in with the wrap. Martin and Jen are quite the restaurant lovers, and even they approved this meal! The mix I made can also be put over rice as a stir fry (or something like that). Dinners at home - my fav!
with love,
Kristin Ann :)

Sunday, April 1, 2012
A late night craving..

So the hubs works late at night, and to keep myself awake I watch tv. Well, at 1 in the morning, my favorite watch is Diners, Drive-ins, and Dives, and oh my gosh! I literally drool and wish I could drive cross country in the middle of the night to eat some of the amazing things he finds on this show! Give it a watch, it's amazing (if you're a greasy/meat/cheese/homestyle lover like I am at least), and it will make your mouth water! To be honest, it's not even always unhealthy stuff, I just saw a salad made, so, really, give it a watch :)

Labels:
recommendations
Saturday, March 31, 2012
A very late birth announcement :)
I realize now, I never posted a birth announcement of our little doll. Here's a few pics of our first days together.

broken promise
isn't she sooooo cute!!??
This little one is crawling already! And I swear she's going to start walking soon! She pulls herself up on everything (causing her parents to be ever so nervous that she's going to take a tumble) but we are so proud! She is a smart little thing, and works for what she wants. Before we know it, she's going to be driving and traveling the world at the age of 2. I would tell her to slow down, but we love it! This girl knows what she wants ;)

Subscribe to:
Comments (Atom)

